Vinegar and Citrus Peels: All Purpose Cleaner
Ingredients:
Vinegar
Citrus peels (orange, lemon, lime)
Directions:
In a large jar, pour vinegar over citrus peels. Allow to soak for a week or so. Pour into a squirt bottle with a little hot/warm water.
I use this to clean counters and appliances mostly but I have also used it on the tile floors. The citrus helps to deter most insects as well. The only thing it doesn't seem to keep away is ants. We still have trouble with ants and can't find anything that keeps them gone. But the citrus works to keep out spiders and other insects.
I don't have a picture of this. I never think to take one when I make a new jar. One of these days, I will remember and add a picture. This method has been shared all over Pinterest and other social media. It does work, is easy, and is cheap. We already use citrus. Now we just keep the peels in a jar for cleaner.
Showing posts with label Home. Show all posts
Showing posts with label Home. Show all posts
Thursday, July 28, 2016

Sunday, September 1, 2013
Throwing Out That Toxic Shampoo
Yes, I did it. I was VERY skeptical of the "no poo" fad. I have always struggled with very oily hair. And I mean OILY! I wash my hair every morning and by noon I was usually putting it up because it was already getting oily. And it made me mad because people always said to wash it less. The reason it was oily was because I was supposedly washing it too much. The whole reason I started washing it so much was because it got that oily!!! And there is no shampoo that works for oily hair. If you have dry or frizzy or colored or curly hair, you have you pick of shampoos and brands. But if you have oily? There are maybe three shampoos you can find. I've tried everything. I also struggled with dandruff and sensitive skin. I have allergies to so many lotions, soaps, shampoos, etc. I recently had a friend take the plunge and try the "no poo" method. After about six months, she and her whole household were still using it and were believers. I visited them and they looked great and were so happy with the decision that I decided to give it a shot. I'm glad I did. It took about two weeks for my hair to really even out but after that it is so soft and smooth. It has body/volume, less dandruff, and I can leave it down all day and when I go to bed at night it still isn't oily. I have been amazed. I am going to tell you how I do this but there really is no RIGHT way. You have to experiment a little to find the right way for you. I still wash my hair with the mixture every morning. I find my hair does best that way. My daughter's hair is only being washed twice a week now but she is only three and that is what works best for her. My friend uses the mixture on her hair a few times a week now and just scrubs with water in between. It depends on your hair (texture, thickness, dry/oily, etc.).
So here is what I do. For the shampoo, I mix about 2 Tbsp. baking soda with about a cup of water. (If you have extra dry hair, you should only use 1 Tbsp. because baking soda can dry.) I put this in a spray bottle that I got at Walmart or Target. Shake it up and spray it all over wet hair. I have a LOT of hair so I pick up my hair and spray it in layers. Some people only have to spray it on top then scrub it in. Experiment and find what works for you. There are also several helpful videos on YouTube that can help you find different methods. Scrub it in and scrub your scalp. I let this sit in my hair a few minutes while I do some other stuff. Then rinse thoroughly.
For the conditioner, (you won't want to skip this, even if you are like me and have oily hair), mix 1 Tbsp. apple cider vinegar in about a cup of water. I put this in another spray bottle. This one I just spray over the top of my hair. If you have really dry hair, you may want to spray more. I've also seen people who have really dry hair mix half cup cider vinegar with half cup water. More vinegar means more moisture. Let this sit for a few minutes too. Then rinse thoroughly. Don't worry, if you rinse thoroughly, your hair won't smell like the apple cider vinegar. I've asked. Nobody has been able to smell it.
Really, you should try this. Read the ingredients in your shampoo and tell me you think those ingredients are okay. Especially if you have crazy skin reactions like I do. Or major issues with your hair or dandruff like I did.
So here is what I do. For the shampoo, I mix about 2 Tbsp. baking soda with about a cup of water. (If you have extra dry hair, you should only use 1 Tbsp. because baking soda can dry.) I put this in a spray bottle that I got at Walmart or Target. Shake it up and spray it all over wet hair. I have a LOT of hair so I pick up my hair and spray it in layers. Some people only have to spray it on top then scrub it in. Experiment and find what works for you. There are also several helpful videos on YouTube that can help you find different methods. Scrub it in and scrub your scalp. I let this sit in my hair a few minutes while I do some other stuff. Then rinse thoroughly.
For the conditioner, (you won't want to skip this, even if you are like me and have oily hair), mix 1 Tbsp. apple cider vinegar in about a cup of water. I put this in another spray bottle. This one I just spray over the top of my hair. If you have really dry hair, you may want to spray more. I've also seen people who have really dry hair mix half cup cider vinegar with half cup water. More vinegar means more moisture. Let this sit for a few minutes too. Then rinse thoroughly. Don't worry, if you rinse thoroughly, your hair won't smell like the apple cider vinegar. I've asked. Nobody has been able to smell it.
Really, you should try this. Read the ingredients in your shampoo and tell me you think those ingredients are okay. Especially if you have crazy skin reactions like I do. Or major issues with your hair or dandruff like I did.
Thursday, January 3, 2013
Ornament Wreath
Here is one of my many Christmas crafts. They are all over Pinterest and the blogosphere and now it is here too. Part of keeping a blog is to just keep everything together in one place along with sharing it with others. I like to share my experience if it could help others but I also like the fact that all of my projects and recipes are in one place for me to go find. I know exactly how my blog is organized and how to find everything.
Materials (with cost):
wire clothes hanger (Free! They come with my husbands clean uniform shirts. We send most back because I hate wire hangers in the closet but I kept a few for projects.)
wire cutters (Free! My husband is so handy. He always has the tools I need in the garage.)
duct tape (I can't remember exact cost. Approximately $2-$3 I used a red duct tape. Did you know they have a million colors of this stuff now?)
tons of cheap Christmas ornament balls (I used about 60 and it ended up smaller than I originally planned. I bought them at the dollar store but by the time I realized I needed more, they were out of every color except gold. Yuck! So I made do with what I had. Originally I spent $6 and had 6 tubes of 10-12 ornaments. So all in all this is a cheap project.)
big festive bow ($2 at Walmart)
hot glue gun with extra sticks of glue (Free! I already have a bunch in the drawer at home.)
Directions:
1. Cut off the hook of the wire hanger with the wire hangers.
2. Hot glue the tops on the top of the ornaments. Trust me, do not skip this step. I went through and if it was easy to pull the tops off, I hot glued. But I thought the rest would be okay. Boy was I wrong. Every time someone opened the door, an ornament fell. Most of them ended up hot glued after the fact and I still have 2 ornaments I found while cleaning up decorations.
3. Start stringing the ornaments on the wire hanger. You will have to move them around to get it to look full. Pack the ornaments on there tight so they don't move and it all looks even.
4. Duct tape the ends of the hanger together to make it a wreath.
5. Attach the big pretty bow to hide the ends and the duct tape.
Voila!


 I'm pretty sure I will try this again next year with more ornaments to make it bigger. But I was pretty happy with how it looked hanging on my door.
Materials (with cost):
wire clothes hanger (Free! They come with my husbands clean uniform shirts. We send most back because I hate wire hangers in the closet but I kept a few for projects.)
wire cutters (Free! My husband is so handy. He always has the tools I need in the garage.)
duct tape (I can't remember exact cost. Approximately $2-$3 I used a red duct tape. Did you know they have a million colors of this stuff now?)
tons of cheap Christmas ornament balls (I used about 60 and it ended up smaller than I originally planned. I bought them at the dollar store but by the time I realized I needed more, they were out of every color except gold. Yuck! So I made do with what I had. Originally I spent $6 and had 6 tubes of 10-12 ornaments. So all in all this is a cheap project.)
big festive bow ($2 at Walmart)
hot glue gun with extra sticks of glue (Free! I already have a bunch in the drawer at home.)
Directions:
1. Cut off the hook of the wire hanger with the wire hangers.
2. Hot glue the tops on the top of the ornaments. Trust me, do not skip this step. I went through and if it was easy to pull the tops off, I hot glued. But I thought the rest would be okay. Boy was I wrong. Every time someone opened the door, an ornament fell. Most of them ended up hot glued after the fact and I still have 2 ornaments I found while cleaning up decorations.
3. Start stringing the ornaments on the wire hanger. You will have to move them around to get it to look full. Pack the ornaments on there tight so they don't move and it all looks even.
4. Duct tape the ends of the hanger together to make it a wreath.
5. Attach the big pretty bow to hide the ends and the duct tape.
Voila!


Wednesday, July 4, 2012
Natural bug sprays and Uses for Baking Soda
This year is extremely bad for bugs. We have been battling them for a few months now. It started with spiders, then went to fleas. Luckily we got a barrier up against the ants before they took over too. And out by the pool we have wasps that won't go away. I thought I would share my natural bug remedies.
Ants:
We have ants every year around here but this year we were determined to prevent from the beginning. We spread diatomaceous earth around outside of the house and window sills. We've had many ants outside but none have made it inside or even on the patio or deck. This is natural and won't hurt kids and pets. If ants do make it inside, dilute some tea tree oil in water. Spray around the areas where ants are or could be and even spray ants themselves.
Spiders:
Magic potion: Orange oil. I was surprised that this worked so well but it did. We were infested with wolf spiders. I was killing 2-6 a day. Good thing I'm not afraid of spiders. I bought a big spray bottle from Target and put a tablespoon of orange oil in about a quart of water. I cleaned everywhere! They were mostly in the kitchen and living room so I even cleaned out the cabinets and sprayed inside with the orange oil and moved the refrigerator to spray underneath and behind. The pantry got cleaned out and all along the baseboards, window sills and doors inside and out. I have not had any more spiders! However, apparently the spiders served some purpose because as soon as I got rid of them, they were replaced with another pesky bug.
Fleas:
I despise fleas and ticks. Luckily here in town, we don't struggle too much with ticks. But the fleas are a completely different story. I have three dogs and a toddler so I don't like to use those nasty, chemical filled bombs. I did end up using a flea shampoo on the dogs because no other methods were working but I was able to use essential oils on the rest of the house. I will give a warning right up front though: Do NOT use wintergreen oil if you have cats. It can be dangerous. What I was told is that it is safe for animals after it dries, but not while you use it, especially for cats. So if you have cats and decide to use this, make sure you have a place to keep them for a couple of hours while it dries. With those warnings out there, I bathed my dogs in their flea shampoo, then left them in the bathroom for a few hours while I cleaned and sprayed. I also did this while the toddler was staying with her Nana for a few hours.
So, now to the cleaning. On the furniture and stuff that cannot be put in the washing machine, you use Eucalyptus oil. About a teaspoon of Eucalyptus to about 4 ounces of water. I actually found 2 ounce spray bottles at Walmart and used those. They have 4 ounce bottles too but I needed multiple bottles and the 2 ounce bottles came in a pack of four. I don't even measure, I just drop it in until it smells about right. I also sprayed the dogs' collars with the Eucalyptus oil mixture. I was told that Eucalyptus is safe for dogs. If you are concerned, I recommend you discuss it with your vet. My dogs did not have any issues. Eddie, our oldest chihuahua had sores from the fleas. He has sensitive skin and allergies anyway so he struggles more with the bugs. I used tea tree oil to doctor his sores and they healed right up.
On the floors and curtains I sprayed a Wintergreen oil mixture. It is diluted about the same as the Eucalyptus. One teaspoon to four ounces. If this is too strong for you, it is okay to dilute it more. Using this much wintergreen definitely assaults the senses. Make sure you open windows and turn on ceiling fans. I actually didn't open windows because it was VERY hot but the ceiling fans helped so much. So I sprayed the wintergreen on all of the carpets and curtains. I let the oil mixture set for a bit. Then I sprinkled baking soda over all of the floors. I have a new love for baking soda. It helps pull stains out of the carpet and soak up any leftover wetness. NOTE: Keep this in mind if you are house training a dog or potty training a toddler. Let the baking soda do it's thing for about 5 minutes and vacuum it all up.
The proof is in the vacuum! Look! I bet you see a surprising amount of dead fleas in there.
Update: One of my close friends called me after she read this and said you can also put dried eucalyptus leaves in your furniture cushions. It was a trick her mom used when we were growing up. So try that too!
Another hint: I reuse a large parmesan cheese canister to fill with baking soda. This makes it easier to sprinkle evenly across the carpets.
 See? It works great and this is much cheaper than buying so many of those store bought carpet cleaning powders.
Ants:
We have ants every year around here but this year we were determined to prevent from the beginning. We spread diatomaceous earth around outside of the house and window sills. We've had many ants outside but none have made it inside or even on the patio or deck. This is natural and won't hurt kids and pets. If ants do make it inside, dilute some tea tree oil in water. Spray around the areas where ants are or could be and even spray ants themselves.
Spiders:
Magic potion: Orange oil. I was surprised that this worked so well but it did. We were infested with wolf spiders. I was killing 2-6 a day. Good thing I'm not afraid of spiders. I bought a big spray bottle from Target and put a tablespoon of orange oil in about a quart of water. I cleaned everywhere! They were mostly in the kitchen and living room so I even cleaned out the cabinets and sprayed inside with the orange oil and moved the refrigerator to spray underneath and behind. The pantry got cleaned out and all along the baseboards, window sills and doors inside and out. I have not had any more spiders! However, apparently the spiders served some purpose because as soon as I got rid of them, they were replaced with another pesky bug.
Fleas:
I despise fleas and ticks. Luckily here in town, we don't struggle too much with ticks. But the fleas are a completely different story. I have three dogs and a toddler so I don't like to use those nasty, chemical filled bombs. I did end up using a flea shampoo on the dogs because no other methods were working but I was able to use essential oils on the rest of the house. I will give a warning right up front though: Do NOT use wintergreen oil if you have cats. It can be dangerous. What I was told is that it is safe for animals after it dries, but not while you use it, especially for cats. So if you have cats and decide to use this, make sure you have a place to keep them for a couple of hours while it dries. With those warnings out there, I bathed my dogs in their flea shampoo, then left them in the bathroom for a few hours while I cleaned and sprayed. I also did this while the toddler was staying with her Nana for a few hours.
So, now to the cleaning. On the furniture and stuff that cannot be put in the washing machine, you use Eucalyptus oil. About a teaspoon of Eucalyptus to about 4 ounces of water. I actually found 2 ounce spray bottles at Walmart and used those. They have 4 ounce bottles too but I needed multiple bottles and the 2 ounce bottles came in a pack of four. I don't even measure, I just drop it in until it smells about right. I also sprayed the dogs' collars with the Eucalyptus oil mixture. I was told that Eucalyptus is safe for dogs. If you are concerned, I recommend you discuss it with your vet. My dogs did not have any issues. Eddie, our oldest chihuahua had sores from the fleas. He has sensitive skin and allergies anyway so he struggles more with the bugs. I used tea tree oil to doctor his sores and they healed right up.
On the floors and curtains I sprayed a Wintergreen oil mixture. It is diluted about the same as the Eucalyptus. One teaspoon to four ounces. If this is too strong for you, it is okay to dilute it more. Using this much wintergreen definitely assaults the senses. Make sure you open windows and turn on ceiling fans. I actually didn't open windows because it was VERY hot but the ceiling fans helped so much. So I sprayed the wintergreen on all of the carpets and curtains. I let the oil mixture set for a bit. Then I sprinkled baking soda over all of the floors. I have a new love for baking soda. It helps pull stains out of the carpet and soak up any leftover wetness. NOTE: Keep this in mind if you are house training a dog or potty training a toddler. Let the baking soda do it's thing for about 5 minutes and vacuum it all up.
The proof is in the vacuum! Look! I bet you see a surprising amount of dead fleas in there.
Update: One of my close friends called me after she read this and said you can also put dried eucalyptus leaves in your furniture cushions. It was a trick her mom used when we were growing up. So try that too!
Another hint: I reuse a large parmesan cheese canister to fill with baking soda. This makes it easier to sprinkle evenly across the carpets.

Friday, June 22, 2012
DIY Cheap Toddler Toy Great for Motor Development
This is another idea I saw on Pinterest and made one of my own. I made it when L was a little over one year old but she would have used it much earlier than that. Some children could probably start using this as early as six months. And guess what... She still uses this thing now at almost two years old. It is much better than cleaning up torn up Kleenex all the time which is what I was doing.
First, most of us have empty wipes boxes lying around when we have infants. I always figure I will find a use for them. I usually do. We've actually gone through two of these so far because when she figured out how to open the wipes box all the way up, she broke the lid off.
Here is what you do: Take some scrap material (I didn't have any scrap at the time so I just used one of her millions of receiving blankets) and cut strips of material about two inches wide and 8-12 inches long. Open up the hole in the top of the wipes box. We just used a knife, then filed the rough edges down. Younger children may not need the top opened up but my child did. Don't open it up too big because they are supposed to have to use their pincher skills to do this. Now put all of the strips of material in the wipes box and pull just one out of the hole a little. Once L saw me pull one out she went at it herself. Here are some pictures of her enjoying her easy, free toy.
The material makes a good hat:


 They are good hats for Charlie too (That is our youngest dog underneath that pile of strips):

First, most of us have empty wipes boxes lying around when we have infants. I always figure I will find a use for them. I usually do. We've actually gone through two of these so far because when she figured out how to open the wipes box all the way up, she broke the lid off.
Here is what you do: Take some scrap material (I didn't have any scrap at the time so I just used one of her millions of receiving blankets) and cut strips of material about two inches wide and 8-12 inches long. Open up the hole in the top of the wipes box. We just used a knife, then filed the rough edges down. Younger children may not need the top opened up but my child did. Don't open it up too big because they are supposed to have to use their pincher skills to do this. Now put all of the strips of material in the wipes box and pull just one out of the hole a little. Once L saw me pull one out she went at it herself. Here are some pictures of her enjoying her easy, free toy.
The material makes a good hat:


DIY Magnet Boards (Great for kids and classrooms)
This is an idea I saw on Pinterest and I made it work for us. I can see great benefits to using this at home and in the classroom. The first one I saw re-purposed a cookie sheet for a magnet board. I didn't have any extra cookie sheets at the time so I sent J to the good old Home Depot to get a small sheet of sheet metal. They will cut it down to the size you need but sometimes they already have small pieces available. When he got it home, we sanded down the edges and spray painted the metal and some screws. We screwed the metal onto the wall and voila! Magnet board in L's bedroom so I don't have to step on the magnets in the kitchen when they fall or get thrown off of the fridge.
I have a cookie sheet now that I am working on re-purposing. I'm still trying to figure out how to get all of the rust and coating off so there aren't imperfections under the spray paint. I have a different activity in mind for it. I will update when I'm finished.

I have a cookie sheet now that I am working on re-purposing. I'm still trying to figure out how to get all of the rust and coating off so there aren't imperfections under the spray paint. I have a different activity in mind for it. I will update when I'm finished.

Sunday, June 17, 2012
Menu Board
This is one of the other projects I am very proud of. I started meal planning and I use a board to plan the whole month at a time. I was inspired by someone else's blog. You can view it HERE. She made a menu board and actually sells them or the components of them. I did a board very similar but modified it to fit my family's needs. It is a work in progress. As I get more completed I will update but this is a start and it is working very well so far. I am spending way less money on groceries and wasting less food. I hate waste and I hate spending money. Just ask my husband.
How it works:
I go through my recipes (books, pinterest, emails, websites, blogs, friends...) and print several off. As I get more completed I will have my own recipe cards to use. I have templates on the computer and recipe cards started but only a few so far. I actually copy the recipes as I put them here on my blog and paste them into my card templates. I have several different categories of foods (i.e. chicken, beef, mexican, pasta, breakfast, salad, beverages, desserts, etc.) and I will print each category on a different color of card stock. I will then put them in a recipe box which I have yet to buy. I will explain more about that later as I get it finished. When I have the menus planned, I go through each week and make a grocery list for each week using the recipes. The grocery lists are held on the side with magnets. I also have a miscellaneous grocery list for other things we need around the house that are not food and I get those as I can. I also have a no no food list on that side which lists food ingredients my daughter cannot have since she is allergic to corn. This helps when other people cook so they can check ingredients. Corn is hidden in so many things and goes by so many names. We are still learning. On the bottom of the board is a cork board strip with push pins. Those will be used later but I have not really used them yet. I have many more plans to implement.
Here is a picture of the board so far. I also use dry erase markers of different colors to show the different food categories. Some are doubled because there are only so many colors you can get in dry erase markers. But it helps to see the variety in the menu. This picture is from this month and I implemented the board half way through the month so it is only halfway filled out. Next month it will be full.

.JPG)
How it works:
I go through my recipes (books, pinterest, emails, websites, blogs, friends...) and print several off. As I get more completed I will have my own recipe cards to use. I have templates on the computer and recipe cards started but only a few so far. I actually copy the recipes as I put them here on my blog and paste them into my card templates. I have several different categories of foods (i.e. chicken, beef, mexican, pasta, breakfast, salad, beverages, desserts, etc.) and I will print each category on a different color of card stock. I will then put them in a recipe box which I have yet to buy. I will explain more about that later as I get it finished. When I have the menus planned, I go through each week and make a grocery list for each week using the recipes. The grocery lists are held on the side with magnets. I also have a miscellaneous grocery list for other things we need around the house that are not food and I get those as I can. I also have a no no food list on that side which lists food ingredients my daughter cannot have since she is allergic to corn. This helps when other people cook so they can check ingredients. Corn is hidden in so many things and goes by so many names. We are still learning. On the bottom of the board is a cork board strip with push pins. Those will be used later but I have not really used them yet. I have many more plans to implement.
Here is a picture of the board so far. I also use dry erase markers of different colors to show the different food categories. Some are doubled because there are only so many colors you can get in dry erase markers. But it helps to see the variety in the menu. This picture is from this month and I implemented the board half way through the month so it is only halfway filled out. Next month it will be full.

.JPG)
Some of My Favorite Kitchen Products
Since I have started spending more time in the kitchen, I have found several products that save time and energy. And some are just plain cool. I'm sure more favorites will be discovered but this is what I have recently found or use regularly.
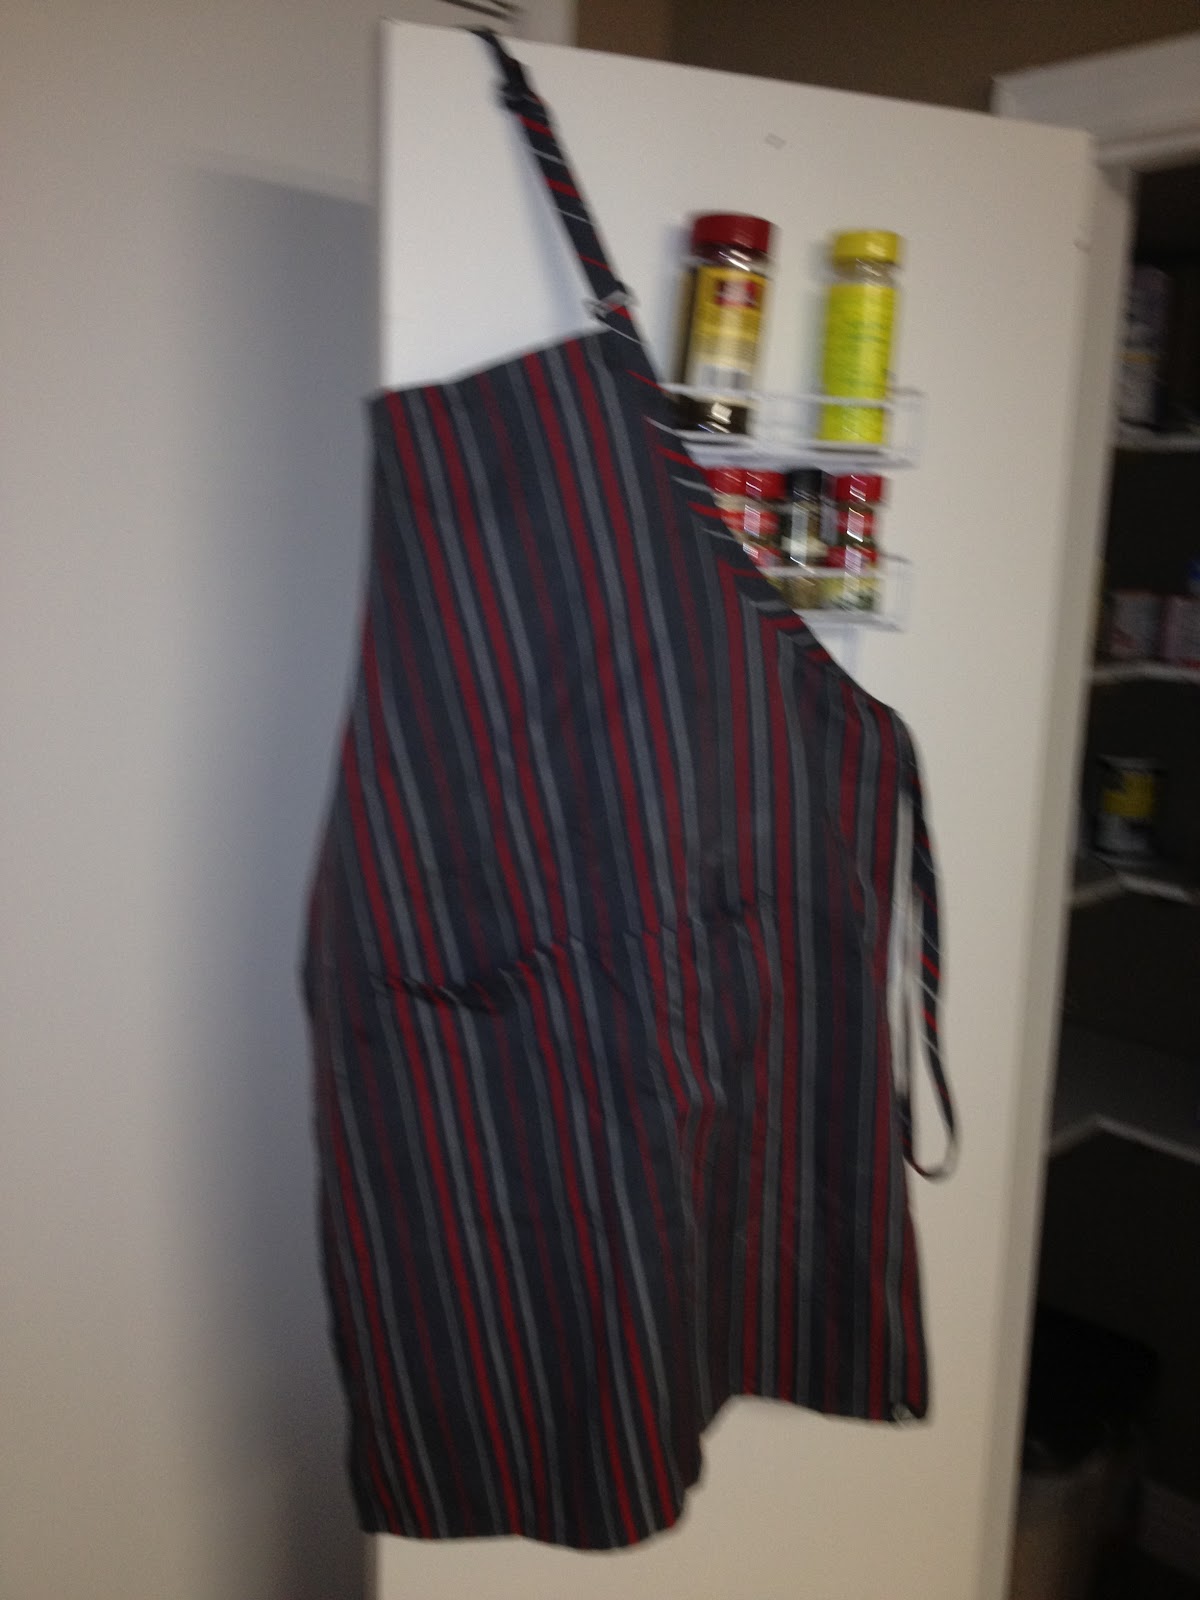
APRON! This is saving my clothes. I quickly learned that cooking ruins clothes. You get splatter stains and little holes from rubbing up against the cabinets. We have one spot in our counter top in front of the sink that is a seam where the formica was split. I have a bunch of little bitty holes in some of my shirts and I finally discovered they are from leaning over the sink, washing dishes. This one also has pockets and an adjustable neck strap so it fits me and the husband. I found this one on amazon for a way better price than anything in the stores around here.
 Digital Slow Cooker! I can program this one to cook for a set number of hours then switch automatically to warm. I've never had a slow cooker that would do that. It has made life so much easier. We found it on sale at Target.
 Food Saver! I've started learning that cooking from scratch and working full time and being a mother and taking care of whatever other miscellaneous things need done, just doesn't always work out. With this magnificent little invention, I can cook some meals ahead of time, seal them, and freeze them. Now I have a quick and easy warm up meal for busy nights. Or an easy, throw it in the slow cooker meal. I've also used it to seal up marinades instead of worrying about my plastic bag breaking open and making a mess in the fridge. Yes, that has happened to me more than once. We also repackage our store bought meat with this in smaller, meal size portions. The meat does not freezer burn in this like they do in plastic bags or plastic wrap.
 A good knife is essential to a cook. I have three actually. And I would love to have a few more. For some meals I have to use all three. The green one pictured is from pampered chef. It keeps a sharp edge for longer and is easy to sharpen yourself. The other two are from A.G. Russel. The one that isn't pictured here is just bigger. Again, they hold the sharp edge longer and are easy to sharpen at home. Note: DO NOT PUT THESE IN THE DISHWASHER! They won't last as long. I always hand wash.
 Over the cabinet door basket! I found these at Bed, Bath and Beyond. I loved them so much, I bought three! In one, I put my essential oils and homemade sprays. In another, I put plastic bags, foil, plastic wrap, straws, etc. And in the third, I put whatever doesn't fit in the others. These allowed me to use wasted cabinet space behind the door and clear out two full kitchen drawers.

 Salt and Pepper Grinders! I paid way more for these than I thought. If I had known how expensive they were (they were on the wrong shelf and I didn't pay enough attention until I got home) I never would have bought them. I'm so glad I didn't pay attention, because they are worth the money. Fill them with peppercorns and salt and grind away. These make it so much easier to spread evenly across food you are cooking and you can actually see how much you are dumping in.
 Slow Cooker Liners! I hate scrubbing the slow cooker after food has cooked on the inside. They are often hard to clean without scratching. And since we use the slow cooker much more often now, this saves so much time and energy. Just spread them across the bowl of the slow cooker, just like you were putting a trash bag in a trash can, dump in the food and cook. When it is done, pull out the food to serve/store, pull out the bag and dump excess liquids down the drain and toss. You still have to wipe out the slow cooker but no scrubbing.
 Toaster Oven! We don't even have a regular oven where we are living right now. We have a gas range and a toaster oven. It is a larger toaster oven with convection bake but it still wasn't all that expensive. You can't put the larger cookie sheets or pizza pans in it but everything else fits. It has worked for us and I will most likely keep using it regularly even when we have an oven again.

APRON! This is saving my clothes. I quickly learned that cooking ruins clothes. You get splatter stains and little holes from rubbing up against the cabinets. We have one spot in our counter top in front of the sink that is a seam where the formica was split. I have a bunch of little bitty holes in some of my shirts and I finally discovered they are from leaning over the sink, washing dishes. This one also has pockets and an adjustable neck strap so it fits me and the husband. I found this one on amazon for a way better price than anything in the stores around here.


Thursday, June 7, 2012
Homemade Baking Soda Air Fresheners
I have been working to find healthier options for air fresheners. I hate spraying the chemicals from the spray cans around my family and I've always hated the smell. I also recently read that new studies are showing that scented candles are possibly causing some breathing problems later in life. And I cannot use soy candles due to hormone issues. I've been told by multiple sources to minimize my exposure to soy. So, the only good option for scented candles is expensive beeswax candles. That's fine now and then but not all the time. I like to have a great smelling home. I am working on some sprays using essential oils so stay tuned for those. But for now, this really works. This could also be a cute gift.
Ingredients and materials:
small mason jar
¼ cup baking soda
1 tsp. of your favorite scent of essential oil
scrap of material big enough to cover the mouth of the jar
pen
scissors
Instructions:
Take the lid off of the jar and pull the middle out. Trace around the lid (the part that comes out). Discard that part of the lid because you won't need it. I saved mine in a drawer in case I want it later. Cut about a half inch outside the circle you traced. Pour the baking soda and essential oil into the jar. Stir together. Put the material over the top and pull as tight as you can and screw on the lid. I used eucalyptus oil and it smells great. I've gotten tons of compliments. I put this one in the bathroom but I will be making more for the kitchen and living area. When the scent starts to fade, just give the jar a little shake. I don't know how long it will last until it needs to be replaced but so far mine has lasted for two weeks and I only shook it once.
And of course, here's a picture:

Ingredients and materials:
small mason jar
¼ cup baking soda
1 tsp. of your favorite scent of essential oil
scrap of material big enough to cover the mouth of the jar
pen
scissors
Instructions:
Take the lid off of the jar and pull the middle out. Trace around the lid (the part that comes out). Discard that part of the lid because you won't need it. I saved mine in a drawer in case I want it later. Cut about a half inch outside the circle you traced. Pour the baking soda and essential oil into the jar. Stir together. Put the material over the top and pull as tight as you can and screw on the lid. I used eucalyptus oil and it smells great. I've gotten tons of compliments. I put this one in the bathroom but I will be making more for the kitchen and living area. When the scent starts to fade, just give the jar a little shake. I don't know how long it will last until it needs to be replaced but so far mine has lasted for two weeks and I only shook it once.
And of course, here's a picture:

This project was adapted from the recipe HERE.
Subscribe to:
Posts (Atom)