Tuesday, June 26, 2012

Creamy Lime Squares

This is really good but nobody else in my family liked it.  I will try it again when L is older and more willing to try new things.

Note:  Make sure you grease the pan REALLY well.  I just sprayed a light layer of my olive oil spray and it wasn't enough because you have to press the crust into the bottom.

This is not my own recipe.  Where did I find it?  Pinterest of course.  And HERE is the original blog where I found the recipe.

Ingredients:
For crust:
1 cup corn-free flour
¼ cup sugar
¼ tsp salt
1stick butter, cold and cut up
For creamy lime filling:
Juice from 5-6 limes (I used 6 like the recipe but it was almost too strong)
1¼ cup sugar
¼ cup flour
4 eggs
Zest of 1 lime
Green food coloring (optional but without the color it is a clear yellow; so far I have not found a trustworth corn-free food coloring)
Corn-free powdered sugar for dusting

Directions:
Preheat oven to 350°F.
To make the crust, combine the sugar, flour and sea salt in a large bowl.  Cut the cold butter and work with your fingers until the mixture resembles cornmeal.  Press into a greased nine inch pan and bake for 20 minutes, until golden.
To make the filling, whisk together the granulated sugar and flour in a bowl.  Add the eggs, one at a time, whisking well after each addition.  Add the zest, lime juice and food coloring and mix well.
Pour filling over hot crust and return to oven to bake for another 20 minutes.  When done, the filling will not jiggle.
Chill.


NOTE:  Make sure you chill this.  The original recipe did not say to chill but it was way too strong before it was chilled.  Somehow being cold made the bars taste better.

My picture isn't even close to as pretty as the one on the original recipe blog.  But here it is anyway.  Can we say St. Patrick's Day treat?


Monday, June 25, 2012

Honey Lime Grilled Chicken

I have a new favorite citrus fruit.  LIME!  I never knew I even liked lime.  I can actually eat slices of lime.  I had no idea how great these little green things were.  I am so glad I tried this.

Ingredients:

4 boneless skinless chicken breasts or 12-15 chicken tenders
1/3 cup honey
1/3 cup olive oil
½ cup lime juice
Zest of one lime
1 tsp. dried thyme
1 tsp. dried rosemary
3 cloves garlic, minced
½ tsp. black pepper
1½ tsp. salt

Directions:
In a bowl, mix well all ingredients except the chicken. Place thawed chicken in a large Ziploc bag and pour mixture over making sure the chicken is coated well.  Marinate for a few hours up to overnight.  Grill until cooked through.  This could also work as a freezer meal.  Just toss into freezer instead of the fridge for marinating.  Set the bag out in the fridge the night before you are going to cook the meal.


Saturday, June 23, 2012

Greek Seasoning

This is another store bought convenience which we were surprised contained corn.  We used Greek seasoning on vegetables a lot.  Using this is how I've gotten my husband, daughter, friends and other family member to eat green beans.  Try it on green beans.  It took some taste testing and many modifications to get this recipe right.  But it is pretty close the the Greek seasoning you buy at the store.

Ingredients:
½ tsp. dried thyme
¼ tsp. dried basil
½ tsp. dried marjoram
1½ tsp. onion powder
¼ tsp. paprika
¼ tsp. garlic powder
½ tsp. freshly ground black pepper
2 tsp. salt
1 tsp. dried parsley

Directions:
I have a mortar and pestle I used for this.  Some people may not mind the larger dried leaves from the herbs but I like it so that I can put it in a shaker to shake on food.  Not to mention, my family is picky about textures.  Just mix all of the listed ingredients together and grind in the mortar and pestle.  Dump into a shaker and use.


Friday, June 22, 2012

Chicken Rollatini Stuffed with Zucchini

NOTE:  This is not corn/dairy free as is.  Cheese has cultures which could include corn.  I am working on a different recipe.

This was amazing!  Even the toddler loved it.  I probably have the only toddler I've ever known who prefers the green veggies.  She picks the spinach out of lasagna and she went crazy over the pieces of chicken with zucchini on them.

Ingredients:
olive oil
4 cloves garlic, minced (garlic powder is good in this too if you don't have fresh)
1 medium sized zucchini (shredded)
¼ cup Parmesan or Romano cheese
2 Tbsp. Parmesan or Romano cheese
3 oz. part skim shredded mozzarella (again, I didn't measure)
salt and pepper
4 chicken breasts (I only made 3 and really stuffed the chicken)
½ cup Italian Breadcrumbs (You can use my homemade version HERE)
Juice of 1 lemon
olive oil spray

Directions:
Preheat oven to 450°F.  Lightly spray a baking dish with the olive oil spray.  In a large skillet, pour in enough olive oil to lightly cover the bottom of the pan for sauteing.  When the oil is hot, add garlic.  When the garlic turns golden add in zucchini, ¼ cup Parmesan or Romano, salt and pepper. Saute for 3-4 minutes.  While the zucchini mixture is cooking, pound the chicken breasts down to ¼-½ inch thick.  Salt and pepper both sides of the chicken.  Take the zucchini mixture off of the heat.  Add in the mozzarella cheese.  In a bowl, mix the breadcrumbs with the rest of the parmesan or romano cheese.  Put the breadcrumbs aside for now.  Spread the zucchini mixture over the chicken breasts and roll up.  Place the chicken roll seam side down on the baking dish.  Bake the chicken rolls for 20 minutes.  Take the chicken out and drizzle with olive oil.  Then sprinkle breadcrumbs over the top.  Bake for 5-10 more minutes.  Serve immediately.


Homemade Italian Bread Crumbs

Again, since the toddler is allergic to corn, we cannot even use store bought bread crumbs.  So I looked up a way to make my own.

Ingredients:
2-4 slices of bread depending on the size of the loaf (This must be homemade for corn and gluten-free)
½ tsp. salt
½ tsp. dry parsley flakes
¼ tsp. garlic powder
¼ tsp. onion powder
¼ tsp. dry oregano
¼ tsp. dry basil leaves
¼ tsp. sugar

Directions:
Toast the 2 pieces of bread to desired consistency.  Break the bread up and put in a food processor or blender.  When the bread is all crumbs, pour them into a bowl and mix in the rest of the ingredients.

I was not thinking at all when I was making this so I didn't use the blender.  Duh right?  So the picture below doesn't look quite right and still has larger bread pieces.  But next time I will do it right.


Lemon Blueberry Muffins

This was one of those recipes I put together one night when I was craving muffins but had to make them with what I had in my pantry. I threw the blueberries in at the end but this can be just lemon muffins if you prefer.  Or you could put a different fruit in them.  I'm thinking Lemon Strawberry Muffins, Lemon Raspberry Muffins...  The possibilities are endless when you start getting creative in the kitchen.  This is actually a mix of a couple of different recipes but they came out great the first time.

Ingredients:
2 cups corn-free all-purpose flour
3 tsp. baking powder
5 Tbsp. butter, melted (I have had good luck baking with grapeseed or coconut oil for dairy free)
1 cup canned coconut milk
1 egg
Zest of one large lemon
Blueberries
¼ cup lemon juice
¼ cup sugar

Directions:
Preheat oven to 350°F. Toss the first measure of sugar, baking powder and flour together in one bowl.  In a separate bowl mix together butter, milk and egg with a fork.  Add the lemon zest and stir.  Combine the dry and liquid ingredients.  Mix together but don't over mix.  Add blueberries now.  Spray 12 muffin tins with olive oil or line with muffin cups.  Divide the mixture evenly between the 12 muffin cups.  Bake for 10-15 minutes.  While the muffins bake, stir together the second measure of sugar and lemon juice.  Do not mix until sugar is dissolved.  Pour over hot muffins as soon as they come out of the oven.  Let set for 5 minutes.  Then dump out the muffins.


Sweet Lemon Rosemary Grilled Chicken

This recipe requires marinating.  I marinated for about an hour and it was perfect.

Ingredients:
½ cup honey (As usual, I didn't actually measure this.  I just poured until it looked right.)
Zest of one lemon
Juice of the fresh lemon
2 Tbsp. olive oil
1½ tsp. dried rosemary or 1½ Tbsp. fresh chopped rosemary
1 clove garlic, minced (or ¼ tsp. garlic powder)
½ tsp. kosher salt
½ tsp. black pepper
4 skinless, boneless chicken breast (butterfly before grilling)

Directions:
In a medium bowl, whisk together the honey, lemon zest, lemon juice, olive oil, rosemary, garlic, salt and pepper.  Place the chicken in a large ziploc bag and pour the mixture over the chicken in the bag.  Mix around to coat the chicken.  Marinate for at least one hour.  We use a charcoal grill so just before we take the chicken out, we have to get the charcoal started.  Brush the grill with olive oil to prevent sticking.  Butterfly the chicken breasts and place on the grill.  Grill until cooked through.  We pour or brush the rest of the marinade on the chicken while it is cooking.  Serve.

I don't have a picture of this one.  I totally forgot to take one but trust me, it is good!  I will try to take a picture next time I make this meal.

Blueberry Pancakes with Strawberry Sauce

NOTE:  This is not guaranteed corn-free as is.  I am working on a recipe for the pancakes to be corn-free.

I don't really have any explanation for this one.  I wanted something easy for dinner and I had leftover blueberries.  Oh, and I don't like syrup.  It's just too sweet for me.  But I love fruit and I always have at least some frozen fruit on hand.

Ingredients:
Pancakes:
1 cup gluten free bisquik
1 cup milk (could be made dairy free with almond or coconut milk)
2 Tbsp. olive oil
1 egg
blueberries

Syrup:
strawberries
sugar (optional)

Directions:
Mix pancake ingredients together in a bowl.  Add blueberries last.  I didn't measure the blueberries.  Meanwhile, in another bowl, mash strawberries.  I used a potato masher this time but you could use a blender or food processor for a smoother topping.  I like the syrup just like that but if you need a little more sweetness, you can add sugar to taste.  I use a flat pan or a griddle and ladle out the pancake mix.  Cook on both sides until golden.  


Sweet Garlic Chicken

This is also a Pinterest find that I have seen over and over again from different blogs.  So it's nothing new but I did change a couple of things in my version.  The garlic was way too much for our taste buds so I actually halved the amount of garlic.  I don't use as much brown sugar as the original recipe either.  I also prefer this meal with tenders rather than breasts.

Ingredients:
12-15 boneless, skinless chicken tenders
2 cloves garlic, minced
salt and pepper
olive oil
brown sugar

Directions:
Salt and pepper the chicken tenders to season. Thinly cover the bottom of your skillet with olive oil and heat over medium heat.  Mince the garlic while the oil is heating.  When the oil is warm, saute the garlic.  Then add the chicken tenders and cook thoroughly.  When the chicken is done but still in the skillet, sprinkle the chicken tenders with brown sugar.  Don't overdo the sugar.  You want the sugar and garlic to compliment each other, not overpower each other.

I know this recipe seems a bit strange but it is so good.


Snickerdoodles from Scratch

I am catching up on my blogs so there may be several posts at one time sometimes.  I have a babysitter today so this is what I am doing.  Since L is allergic to corn (and corn is in everything store bought) and I have been trying to eat healthier, I have been cooking everything.  I don't want to deprive us of sweets now and then or for special occasions so I make sweets from scratch too.  So far I have lost over 30 pounds doing this cooking thing and I still eat the sweets I make.  I don't make dessert everyday or even once a week but if I am craving something sweet and fruit doesn't cut it, I make something.  Usually, I already have ingredients on hand to make a batch of cookies or muffins.

Here is a from scratch recipe for snickerdoodles.  Why snickerdoodles?  It is the only cookie J will eat.  Picky husband.

Ingredients:
1 cup butter or grapeseed oil
1½ cups sugar
2 large eggs
2 ¾ cups flour
2 tsp. corn free baking powder
1 tsp. baking soda
¼ tsp. salt
3 Tbsp. sugar
3 tsp. cinnamon

Directions:
Preheat oven to 350°F. Mix butter, 1½ cups sugar and eggs thoroughly in large bowl. Combine flour, baking powder, baking soda and salt in a separate bowl. Blend dry ingredients into butter mixture.  Chill dough.  The original recipe said to chill the cookie sheet instead of greasing it but I didn't do that.  I just greased the pan with a bit of grapeseed oil.  While your dough is chilling, mix the 3 Tbsp. sugar and 3 tsp. cinnamon in a small bowl.  Roll the dough in your hands to make 1 inch balls.  Coat by gently rolling the balls of dough in the sugar mixture.  Place on cookie sheet and bake approximately 10 minutes.  (I never cook them the full amount because I like the cookies soft)  Remove cookies from the pan immediately.


DIY Cheap Toddler Toy Great for Motor Development

This is another idea I saw on Pinterest and made one of my own.  I made it when L was a little over one year old but she would have used it much earlier than that.  Some children could probably start using this as early as six months.  And guess what...  She still uses this thing now at almost two years old.  It is much better than cleaning up torn up Kleenex all the time which is what I was doing.

First, most of us have empty wipes boxes lying around when we have infants.  I always figure I will find a use for them.  I usually do.  We've actually gone through two of these so far because when she figured out how to open the wipes box all the way up, she broke the lid off.

Here is what you do:  Take some scrap material (I didn't have any scrap at the time so I just used one of her millions of receiving blankets) and cut strips of material about two inches wide and 8-12 inches long.  Open up the hole in the top of the wipes box.  We just used a knife, then filed the rough edges down.  Younger children may not need the top opened up but my child did.  Don't open it up too big because they are supposed to have to use their pincher skills to do this.  Now put all of the strips of material in the wipes box and pull just one out of the hole a little.  Once L saw me pull one out she went at it herself.  Here are some pictures of her enjoying her easy, free toy.

The material makes a good hat:


 They are good hats for Charlie too (That is our youngest dog underneath that pile of strips):

DIY Magnet Boards (Great for kids and classrooms)

This is an idea I saw on Pinterest and I made it work for us.  I can see great benefits to using this at home and in the classroom.  The first one I saw re-purposed a cookie sheet for a magnet board.  I didn't have any extra cookie sheets at the time so I sent J to the good old Home Depot to get a small sheet of sheet metal.  They will cut it down to the size you need but sometimes they already have small pieces available.  When he got it home, we sanded down the edges and spray painted the metal and some screws.  We screwed the metal onto the wall and voila!  Magnet board in L's bedroom so I don't have to step on the magnets in the kitchen when they fall or get thrown off of the fridge.

I have a cookie sheet now that I am working on re-purposing.  I'm still trying to figure out how to get all of the rust and coating off so there aren't imperfections under the spray paint.  I have a different activity in mind for it.  I will update when I'm finished.


Wednesday, June 20, 2012

Strawberry Banana Ice Cream

Since we have a corn allergy in the house, we cannot eat store bought ice cream or popsicles.  So I've been experimenting a little.  This is my first successful homemade ice cream.  L loved it.

Ingredients:
1 sliced and frozen banana
1 handful frozen strawberries
2 Tbsp coconut milk (you could use any milk here but this makes it dairy/nut-free)
1 tsp corn-free vanilla extract (I'm still working on corn-free substitutions here; It can be left out)

Blend all ingredients until smooth.  Serve.  This only makes about 1 serving but was plenty for me and L to share.

I always have frozen strawberries on hand because they are easy to buy that way.  I didn't have a frozen banana so the ice cream wasn't quite frozen when it came out of the blender.  I poured it in a bowl and put it in the freezer and by the time dinner was done, it was close to normal ice cream texture.  If you have a frozen banana though, it should come out of the blender like ice cream.

Note:  For those of you with a real sweet tooth who need sugar on your fruit, you may need to add a tiny bit of sugar to this.  I liked it as is but fruit is plenty sweet to me.  But remember, more sugar = less healthy.


Tomato Basil Soup

Since our daughter cannot have corn, that means no canned soup in this house.  So, we have to make our own.  So far, she loves soups and stews and they are easy to do in a slow cooker so I try new ones now and then.  This one was not made in a slow cooker but was easy and quick.  The original recipe is HERE.  I didn't really deviate from this ingredient list other than the coconut milk.  It worked fine.

Ingredients:
4 cups crushed tomatoes (To be corn-free, this must be home canned or home crushed.  All cans in stores contain citric acid which is a corn product.  The only safe brand of canned tomatoes is Eden's.)
12 fresh basil leaves
1 cup canned coconut milk
1 stick unsalted butter (for dairy free you can use oil instead but use less; or you can leave this out altogether and just add a little bit more milk)
salt and pepper to taste

Instructions:
Blend all ingredients together in a blender/food processor.  Pour in large saucepan and simmer for about thirty minutes.  Serve.  Our toddler actually ate two small bowls full of this.  And she is a VERY picky eater.  You could easily use this as a lunch on the go or serve it with a favorite bread or crackers.  This recipe filled 3 pint sized mason jars.  I put one in the freezer for later.


Sunday, June 17, 2012

Menu Board

This is one of the other projects I am very proud of.  I started meal planning and I use a board to plan the whole month at a time.  I was inspired by someone else's blog.  You can view it HERE.  She made a menu board and actually sells them or the components of them.  I did a board very similar but modified it to fit my family's needs.  It is a work in progress.  As I get more completed I will update but this is a start and it is working very well so far.  I am spending way less money on groceries and wasting less food.  I hate waste and I hate spending money.  Just ask my husband.

How it works:
I go through my recipes (books, pinterest, emails, websites, blogs, friends...) and print several off.  As I get more completed I will have my own recipe cards to use.  I have templates on the computer and recipe cards started but only a few so far.  I actually copy the recipes as I put them here on my blog and paste them into my card templates.  I have several different categories of foods (i.e. chicken, beef, mexican, pasta, breakfast, salad, beverages, desserts, etc.) and I will print each category on a different color of card stock.  I will then put them in a recipe box which I have yet to buy.  I will explain more about that later as I get it finished.  When I have the menus planned, I go through each week and make a grocery list for each week using the recipes.  The grocery lists are held on the side with magnets.  I also have a miscellaneous grocery list for other things we need around the house that are not food and I get those as I can.  I also have a no no food list on that side which lists food ingredients my daughter cannot have since she is allergic to corn.  This helps when other people cook so they can check ingredients.  Corn is hidden in so many things and goes by so many names.  We are still learning.  On the bottom of the board is a cork board strip with push pins.  Those will be used later but I have not really used them yet.  I have many more plans to implement.

Here is a picture of the board so far.  I also use dry erase markers of different colors to show the different food categories.  Some are doubled because there are only so many colors you can get in dry erase markers.  But it helps to see the variety in the menu.  This picture is from this month and I implemented the board half way through the month so it is only halfway filled out.  Next month it will be full.


Some of My Favorite Kitchen Products

Since I have started spending more time in the kitchen, I have found several products that save time and energy.  And some are just plain cool.  I'm sure more favorites will be discovered but this is what I have recently found or use regularly.

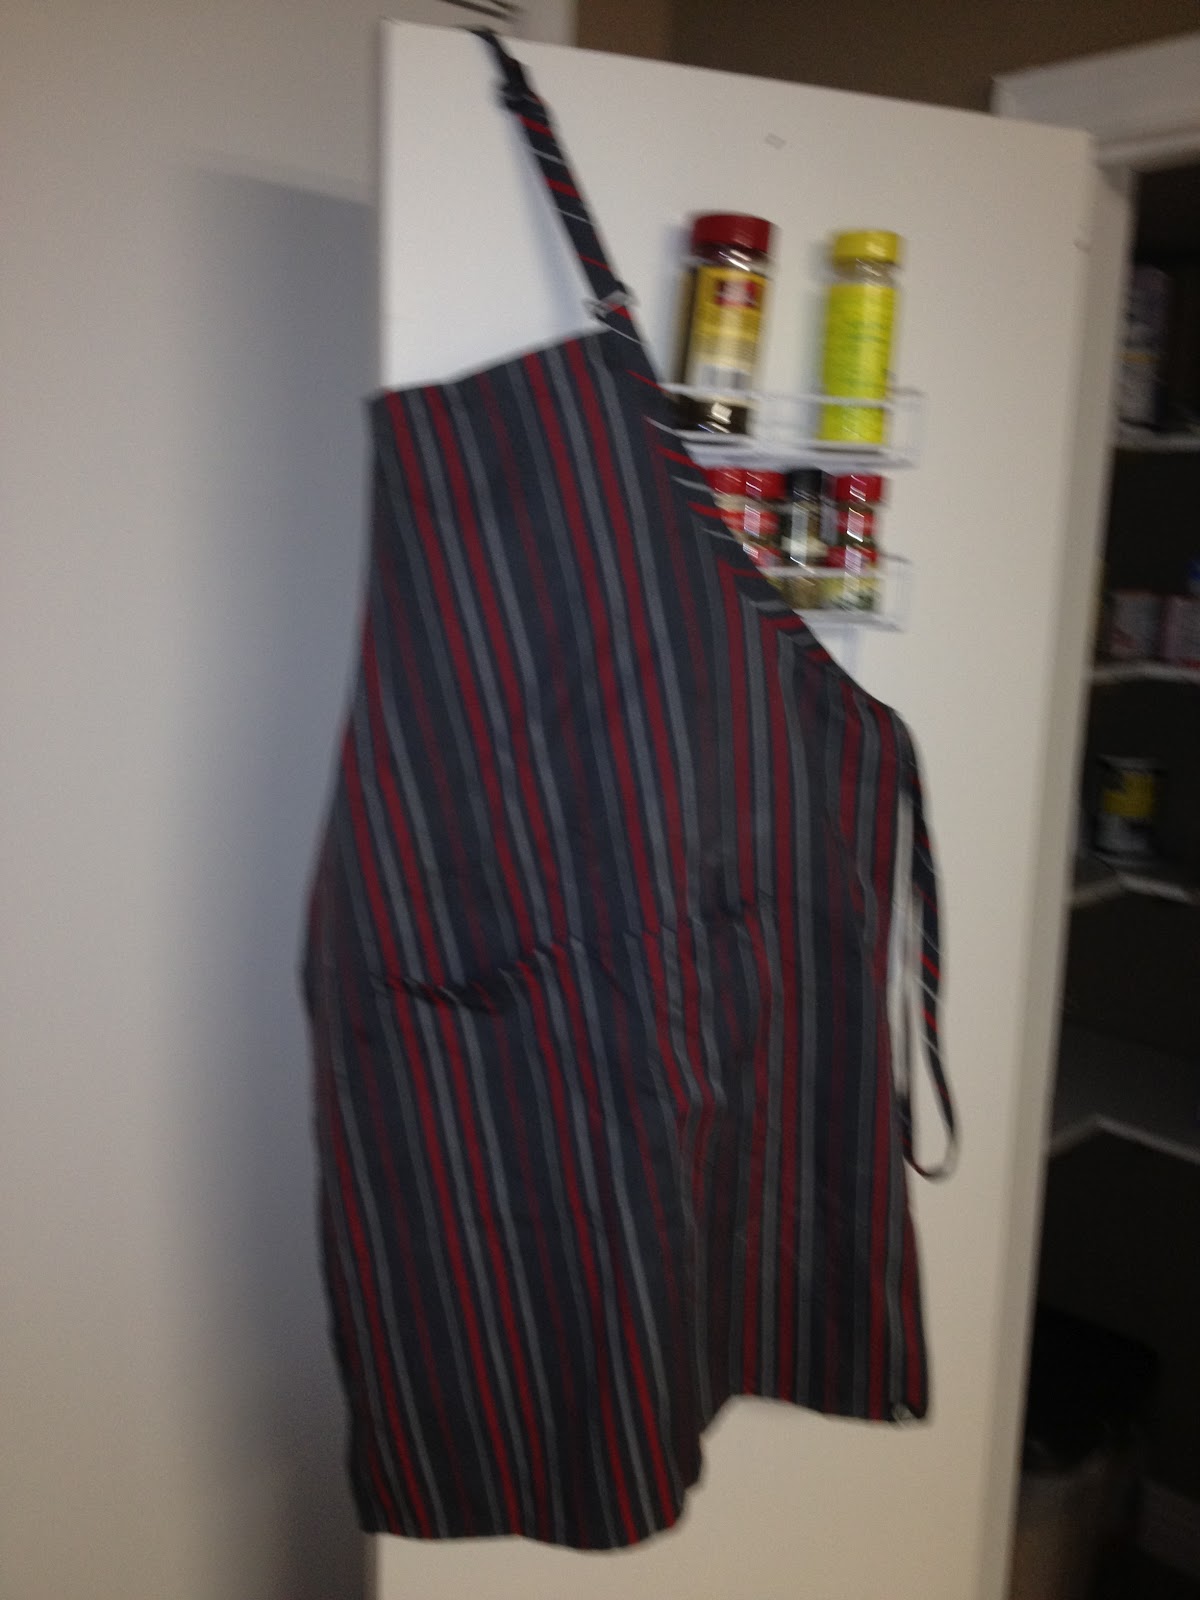
APRON!  This is saving my clothes.  I quickly learned that cooking ruins clothes.  You get splatter stains and little holes from rubbing up against the cabinets.  We have one spot in our counter top in front of the sink that is a seam where the formica was split.  I have a bunch of little bitty holes in some of my shirts and I finally discovered they are from leaning over the sink, washing dishes. This one also has pockets and an adjustable neck strap so it fits me and the husband.  I found this one on amazon for a way better price than anything in the stores around here.
 Digital Slow Cooker!  I can program this one to cook for a set number of hours then switch automatically to warm.  I've never had a slow cooker that would do that.  It has made life so much easier.  We found it on sale at Target.
 Food Saver!  I've started learning that cooking from scratch and working full time and being a mother and taking care of whatever other miscellaneous things need done, just doesn't always work out.  With this magnificent little invention, I can cook some meals ahead of time, seal them, and freeze them.  Now I have a quick and easy warm up meal for busy nights.  Or an easy, throw it in the slow cooker meal.  I've also used it to seal up marinades instead of worrying about my plastic bag breaking open and making a mess in the fridge.  Yes, that has happened to me more than once.  We also repackage our store bought meat with this in smaller, meal size portions.  The meat does not freezer burn in this like they do in plastic bags or plastic wrap.
 A good knife is essential to a cook.  I have three actually.  And I would love to have a few more.  For some meals I have to use all three. The green one pictured is from pampered chef.  It keeps a sharp edge for longer and is easy to sharpen yourself.  The other two are from A.G. Russel.  The one that isn't pictured here is just bigger.  Again, they hold the sharp edge longer and are easy to sharpen at home.  Note:  DO NOT PUT THESE IN THE DISHWASHER!  They won't last as long.  I always hand wash.
 Over the cabinet door basket!  I found these at Bed, Bath and Beyond.  I loved them so much, I bought three!  In one, I put my essential oils and homemade sprays.  In another, I put plastic bags, foil, plastic wrap, straws, etc.  And in the third, I put whatever doesn't fit in the others.  These allowed me to use wasted cabinet space behind the door and clear out two full kitchen drawers.

 Salt and Pepper Grinders!  I paid way more for these than I thought.  If I had known how expensive they were (they were on the wrong shelf and I didn't pay enough attention until I got home) I never would have bought them.  I'm so glad I didn't pay attention, because they are worth the money.  Fill them with peppercorns and salt and grind away.  These make it so much easier to spread evenly across food you are cooking and you can actually see how much you are dumping in.
 Slow Cooker Liners!  I hate scrubbing the slow cooker after food has cooked on the inside.  They are often hard to clean without scratching.  And since we use the slow cooker much more often now, this saves so much time and energy.  Just spread them across the bowl of the slow cooker, just like you were putting a trash bag in a trash can, dump in the food and cook.  When it is done, pull out the food to serve/store, pull out the bag and dump excess liquids down the drain and toss.  You still have to wipe out the slow cooker but no scrubbing.
 Toaster Oven!  We don't even have a regular oven where we are living right now.  We have a gas range and a toaster oven.  It is a larger toaster oven with convection bake but it still wasn't all that expensive.  You can't put the larger cookie sheets or pizza pans in it but everything else fits.  It has worked for us and I will most likely keep using it regularly even when we have an oven again.

Saturday, June 16, 2012

DIY Adjustment Straps for Toddler Clothes

I recently asked several friends and family members how to keep my toddlers pants up.  She is tall and skinny so I have to buy pants two sizes too big in the waist just to get them long enough.  But she's still too small for the toddler clothes that already have adjustment straps in them.  Well, I set out to figure it out myself.  People who know me personally know that I am so not a crafty person by nature.  I enjoy making things and fixing things, but I'm just not good at it.  I am getting better.  It's true what they say about practice.  It does make you better.  I was pretty proud of myself for this accomplishment.  I went to my local Hobby Lobby and looked around.  I had no idea what I was looking for but I was determined to figure it out.  There was no way I was paying for a tailor for my toddler who constantly changes and grows.  I came across these elastic straps that already had button holes.  Set against a white bag you can see the button holes.


Then I went and bought some buttons that were just a little bigger than the button holes.  I sewed buttons on the inside of the waistband.  One button was sewn just in front of the side seem and one was sewn by the button hole already on the waistband.  I did the same on both sides of the button/zipper of the pants/jeans/skirts/shorts.


Then cut the elastic the same length between the two buttons on each side.  Burn the ends of the elastic or it will unravel.  I learned that the hard way.  Now adjust as needed.  It works great.  This has worked with two pairs of jeans so far.

Chicken and More Flautas

This recipe has quickly become a favorite of family and friends around here.  It was very difficult the first time I did it.  I read this from a recipe that said it would take a total of 45 minutes.  WRONG!!!  It took about an hour and a half.  However, the next time I did it, I cooked the chicken in the slow cooker.  This let the hardest part of the meal cook all day.  So, I'm going to show the recipe using a slow cooker.  You can cook the chicken in a pot on the stove but it made my life so much easier to cook the chicken in the slow cooker.  You could also easily make the flautas with different ingredients.  I've thought about doing a bean, rice and cheese flauta or a shredded beef/pork or a ground beef/turkey this way.  But for this, I will give ingredients and instructions to make 10 flautas.  Five flautas are spinach and chicken and five flautas are chicken and salsa.  I can think of several different varieties to try later.


Ingredients:
1lb. boneless, skinless chicken (I've used breasts and tenders.  The original recipe used thighs.)
1½ bottles of your favorite beer (chicken stock works too, especially for corn and gluten free;  this would be a little over 3 cups.)
3 cups water
½ tsp. paprika
1 tsp. salt
½ tsp. garlic powder
½ tsp. cumin
½ tsp. chili powder
1 cup baby spinach, chopped
5 large burrito size tortillas (homemade for corn free, I am currently working on a recipe for this)
oil for greasing the pan
salsa, sour cream, guacamole, queso for dipping

Directions:
To cook the chicken, put the chicken in a slow cooker.  Pour in the beer/stock and water.  If it doesn't cover the chicken, add more beer/stock or water.  Cook on low for 6 hours.
Now for the flautas!  Preheat oven to 450°F. Shred the chicken.  I used two forks to do this.  You could also use a blender/food processor but that tends to pulverize rather than shred.  Mix together the the chicken with the spices/seasonings.  In a small saucepan, pour ¼ cup of the liquid in which you cooked your chicken into the pan.  On low heat, cook the spinach in this pan until wilted.  If you like extra spice, you can also include a seeded, chopped jalapeno in the pot with the spinach.  We don't do spicy in our house, so I left this out.  Coat a cookie sheet with oil.  Cut the tortillas in half.  On five of the tortilla halves, spread a line of chicken on the long edge of the tortilla half.  Spoon a little spinach mixture on top.  Spread some shredded cheese over that.
Like this:


Now roll from the long, cut edge of the tortilla half.  Put the flauta on the oiled cookie sheet, seem side down.  Do this for five of the tortilla halves.  For the other five, spread chicken just like the others.  Then top with your favorite salsa.  (We use One the Border mild salsa.  I love the salsa in the store, not so much in the restaurant.)  Then top with shredded cheese (unless corn/dairy free) and roll up just like the others.  Put the flautas in the oven for 5-10 minutes, until they are crispy and golden brown on the edges.  Serve with salsa, sour cream, guacamole, queso or whatever you prefer.

Pictures:


Recipe modified from HERE.

Creamy Garlic Noodles

This is another pasta but it was another hit in our household.  I made it with spaghetti noodles like the original recipe did but I think it would be better with a swirly egg noodle or fettuccine noodle.


Ingredients:
2 tsp. olive oil
4 cloves garlic, minced (I actually used garlic powder instead of garlic.  If you do this, use 1 tsp. garlic powder and nix the olive oil.)
2 Tbsp. butter (can use oil for dairy free)
¼ tsp. salt
½ tsp. pepper
3 cups plus a little chicken stock (watch ingredients)
½ lb. pasta (use gluten free if needed)
1 cup grated parmesan cheese (leave out for dairy and corn free; add to individual bowls later if desired)
1 cup canned coconut cream
2 Tbsp. chopped fresh parsley (I only had dried parsley on hand so I used dried)

Directions:
In a pot, bring the olive oil to medium-low heat.  Add the garlic and stir for 1-2 minutes.  (I skipped these first two steps because I used garlic powder)  Pour in chicken stock.  Stir in salt, butter (garlic powder if you use it) and pepper.  Raise the heat until the butter is melted and mixture is boiling.

Once it is boiling, add pasta and cook to desired consistency.  This is when I had to add chicken stock because I like my pasta cooked softer than the typical al dente. Reduce heat to medium and stir in the parmesan until it is melted.  Then stir in milk and parsley.  Turn off heat.  Serve.

The original recipe is HERE.

Sunday, June 10, 2012

Slow Cooker BBQ Chicken

This was a hit tonight and made enough for leftovers for J to take to work for dinner for the next two days.

Ingredients:
4 boneless, skinless chicken breasts or 12-15 tenders
1 pint BBQ sauce (must be homemade for corn and gluten free)
¼ cup brown sugar (watch ingredients; I use a safe organic brand which I feel I can trust is corn free)
pepper
chicken broth (watch ingredients)

Directions:
Put chicken in a slow cooker.  I put the chicken in frozen.  In a separate bowl, mix together BBQ sauce, brown sugar and pepper.  I have a pepper grinder and I just put some pepper in without measuring.  You can add more later if needed.  Pour the sauce mixture over the chicken.  Pour enough chicken broth to cover the chicken in liquid.  It took about a cup or a little more to cover the frozen tenders.  Stir it all together and cook in the slow cooker on low for 4-6 hours.  Since the chicken I used was frozen, I checked on it at 5 hours and I thought it needed more so I put the cooker on high for the last hour.  The chicken tasted great and was very tender.

This isn't a very pretty picture but I didn't make it all fancy tonight. But if you're like me, you need a visual.  Hopefully I will get better at taking food pictures as I go.


Thursday, June 7, 2012

Homemade Baking Soda Air Fresheners

I have been working to find healthier options for air fresheners.  I hate spraying the chemicals from the spray cans around my family and I've always hated the smell.  I also recently read that new studies are showing that scented candles are possibly causing some breathing problems later in life.  And I cannot use soy candles due to hormone issues.  I've been told by multiple sources to minimize my exposure to soy.  So, the only good option for scented candles is expensive beeswax candles.  That's fine now and then but not all the time.  I like to have a great smelling home.  I am working on some sprays using essential oils so stay tuned for those.  But for now, this really works.  This could also be a cute gift.

Ingredients and materials:
small mason jar
¼ cup baking soda
1 tsp. of your favorite scent of essential oil
scrap of material big enough to cover the mouth of the jar
pen
scissors

Instructions:
Take the lid off of the jar and pull the middle out.  Trace around the lid (the part that comes out).  Discard that part of the lid because you won't need it.  I saved mine in a drawer in case I want it later.  Cut about a half inch outside the circle you traced. Pour the baking soda and essential oil into the jar. Stir together.  Put the material over the top and pull as tight as you can and screw on the lid.  I used eucalyptus oil and it smells great.  I've gotten tons of compliments.  I put this one in the bathroom but I will be making more for the kitchen and living area.  When the scent starts to fade, just give the jar a little shake.  I don't know how long it will last until it needs to be replaced but so far mine has lasted for two weeks and I only shook it once.

And of course, here's a picture:


This project was adapted from the recipe HERE.

Wednesday, June 6, 2012

Chicken with Mustard Cream Sauce

The beauty of this recipe is that it can easily be halved or doubled.  I halved it for just the three of us because L just doesn't eat much yet so I shared a chicken breast with her.  I don't need a whole one to fill me up.

Ingredients:
4 boneless, skinless chicken breast halves or about 15 tenders
olive oil
salt and pepper
¼ cup chicken broth (watch ingredients)
½ cup canned coconut milk
Dijon mustard (The original recipe called for 2 Tbsp. but as I've said before, I don't measure.  I just added until it tasted right.  But if you measure, this is a good measurement to start with.  Also, with this ingredient, it isn't corn-free and possibly not gluten-free unless you have made a homemade version.  I am working on one of these.)

Directions:
First, I pounded down my chicken breasts.  When chicken breasts are cooked in a skillet, they cook more evenly and easily when they are thinner.  Next add oil to a large skillet and start heating.  Season chicken with salt and pepper to your taste.  Add chicken to skillet and cook until golden brown on both sides and cooked thoroughly.  Now the original recipe said to wait to make the sauce until the chicken is done and make it in the same skillet.  I didn't do this because I multitask to get it done.  My family works best on a bit of a schedule and I don't have time to cook in the kitchen all day, so if I can save time I do.  But this is up to you.  While my chicken was cooking, I made the sauce in a separate saucepan.  Pour chicken broth into the pan and start warming.  Then whisk in milk, then mustard, then I added a little bit of pepper.  You can add salt but be careful because between the salt on the chicken and the salt in the sauce, they may not taste salty separately, but they will taste salty together.  So salt sparingly.  Taste the sauce as soon as it gets warm to see if you need anything else.  When the chicken is done, pour the sauce over the chicken or put it on the side for dipping.  I poured mine over the chicken but put J's to the side.  He is pickier about sauces but he liked this one.

Note:  The original recipe called for oregano or terragon in the sauce but I thought those herbs were too strong because the sauce was already very flavorful.  You can find the original recipe HERE.

I served this with a side salad using my homemade buttermilk ranch from my previous post.  You can find that HERE.  I also added a mashed potato for the toddler who is teething so she wouldn't eat much unless it was soft.  She did like the ranch though, and licked it off of the carrots.

And of course, I have pictures.  The first picture is of the toddler plate.  The other one is of the adult plates.


Saturday, June 2, 2012

Chicken Fettuccine Alfredo

I've been busy today.  This is my second new recipe in one day.  It's good though.  I've always gotten raves for my alfredo but I've made improvements over the years and made even more improvements today in order to make the recipe corn free.  I used to include Season Salt.  Well, all of the season salts I have found so far have corn ingredients.  I will be working to make my own season salt so stay tuned for that.  This was a hit with the family tonight so I will share.

Ingredients:
3 boneless, skinless chicken breasts
1-16oz. package fettuccine noodles (this can be gluten free with gluten free noodles)
¼ cup butter (an oil can be used instead of butter but use a little less or the sauce will be oily)
¼ cup chicken stock (watch ingredients)
1 can coconut milk
½ tsp. paprika
½ tsp. garlic powder
½ tsp. onion powder
½ tsp. dried thyme
1 cup grated parmesan cheese (more can be added to taste; leave out for corn and dairy free)
salt and pepper to taste

Directions:
Season the three chicken breasts with salt and pepper and a little bit of olive oil.  Grill until finished.  Slice into thin slices.

While the chicken is grilling, boil the noodles to desired firmness.  The top chefs always say al dente.  Well, I like mine softer than that.

While the noodles are boiling and the chicken is grilling, make the alfredo sauce.  In large pan, melt butter.  Pour in chicken stock.  Gradually stir in the heavy cream.  Bring to a simmer while stirring almost constantly. Add in paprika, garlic powder, onion powder, thyme, salt and pepper.  Taste at this point to check salt and pepper.  Stir in the parmesan cheese.  Taste now and add any salt, pepper or extra parmesan cheese to your taste.

Now toss noodles, chicken and sauce all together.  Serve.  This easily makes 5 servings and can make up to 10 servings when served with other side dishes.  This goes great with a small salad.

Of course you want to see a picture right?  Well, here you go:


Are you drooling yet?  I know it looks a little difficult and involved but it really isn't.  If I can make it, anyone can.  And my husband and I worked together to make this meal.  I love cooking together to make something so good.  Not to mention, we have plenty leftover to take to work for lunch a couple of days this week.

Homemade Ranch Dressing

Yes, I know there are tons of recipes for this stuff online.  Especially on Pinterest.  But this is my recipe.  I started with a recipe I found on Pinterest but it was extremely bland so I just figured it out on my own.  And now, I'm sharing it with you.

Ingredients:

1 1/2 cup sour cream (you could use coconut yogurt here to make this dairy-free)
1 1/2 cup canned coconut milk
1 tsp. lemon juice
1 Tbsp. parsley
1/2 tsp. garlic powder
1/4 tsp. salt
1/4 tsp. pepper
1 tsp. dried chives
2 tsp. onion powder
2 Tbsp. olive oil
1/2 cup grated parmesan cheese (leave this out for corn-free and dairy-free)

Directions:
Mix all ingredients together well.  Pour into air tight containers and chill before using.  Keep in the fridge for up to 2 weeks or in the freezer for up to 3 months.

Makes 2 pints/1 quart

I put mine in two pint sized mason jars.  One went in the fridge and one went in the freezer.  Note:  Make sure you get freezer safe jars.

This is what it looks like:


Note:  Watch the ingredients of sour cream if you are watching corn.  Some have sodium citrate as a preservative ingredient.